A friend of mine needed help getting content for the 2013 Tucson Sculpture Festival. The purpose of the event was to “kick sculpture into the 21st century”. And what screams 21st century louder than 3D scanning and virtual reality? I suggested to my friend a digital online sculpture gallery as a counterpart to the actual one. He loved the idea and told me to pursue it. At that point all I had to do was get a web server running, find an open source virtual world application, figure out how to display 3D objects we made ourselves in that world and make it available to guests at the sculpture event. No problem.
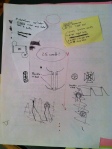
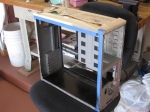
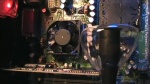
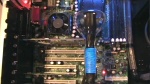
After a little Googling I quickly found OpenSim, a free alternative to Second Life. OpenSim requires a server to run on. Members connect remotely to the server over the internet. So I needed a server. Luckily I’m a member of Xerocraft, Tucson’s Hackerspace. Not only did we have a bunch of donated servers lying around, there were also several members who could get one going. A few days later and Xerocraft had its own dedicated server running Ubuntu. I installed OpenSim and after a ridiculous amount of trial and error to fix a simple little IP problem, I got remote connection working. Now I could build my virtual world from home. I used the Build options to excavate the bump of land in an infinite ocean that I started with. I created my island in a day. The biblical comparison is obvious so I’ll let it go.

“It is good.”
But what about the statues? I still had no idea if I could really input 3D models and use them as sculptures in OpenSim. Up to this point I only assumed it was possible based on things I’d seen online. I still didn’t really know if I could deliver on my promise. I researched content creation in Second Life and came upon sculpted prims. But my hopes were quickly dashed when I tried to actually make my own sculpted prim using Blender. It’s hard. So I researched some more and discovered meshes. That’s when it all started to come together.
Meshes are 3D models that are brought into OpenSim using third party software. At Xerocraft we had many member-created 3D models to choose from. 3D scanning is becoming incredibly simple thanks to software like ReconstructMe and 123D Catch. And if you don’t want to create your own models, you can always download some from Thingiverse. I used Blender’s decimate function to reduce the file size (to about 5mb or less) and complexity of the 3D images and converted them to Collada (.dae) files, the only format that OpenSim accepts for meshes. Note: You may need to enable OpenSim to accept meshes.
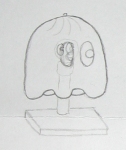
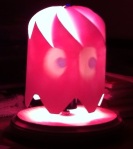
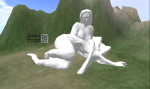
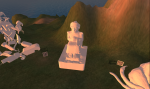
Virtual statues can do things that real statues cannot, like float in the air.
Now to import the statues into the virtual world. I found a tutorial online that explained that I had to use an OpenSim viewer that was capable of uploading meshes and not just viewing them. Most client-side viewers can view meshes but very few can upload them as of this writing. I quickly settled on the OpenSim build of Firestorm. I read on and the tutorial explained the upload process:
- Go to Build > Upload > Mesh Model…, navigate to the folder where the DAE file resides and select it. Note: You may get a window telling you that physics is not available for meshes. We’ll keep this in mind for step 3. Click Close. An image of the model should appear in the Preview window.
- In the upper-left corner you can name the mesh and define what kind of object it is. Under the Level of Detail tab, select High.
- Click the Physics tab. Next to Step 1: Level of Detail, select Lowest.
- At the bottom-left corner of the window, click Calculate weights & fee. Wait for the darkened Upload button to highlight and click it.
- Wait for a moment and the mesh will appear in your Inventory menu in the Objects folder. Navigate to the spot in your world where you want to place the statue. Drag the mesh from the Objects folder to that spot.
Give the mesh a minute or two to appear. After that, use OpenSim’s prim controls to rotate and resize the statue to your liking. If the statue never appears, the file size is probably too big. Delete the item from your inventory and try decimating it again in Blender.
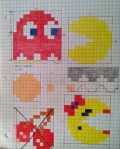
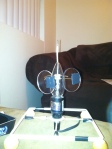
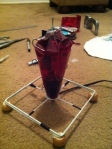
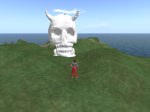
More images from my sculpture gallery are shown below:
-
- The Statue of Gudea was downloaded from Thingiverse.


 Posted by Jeremy